
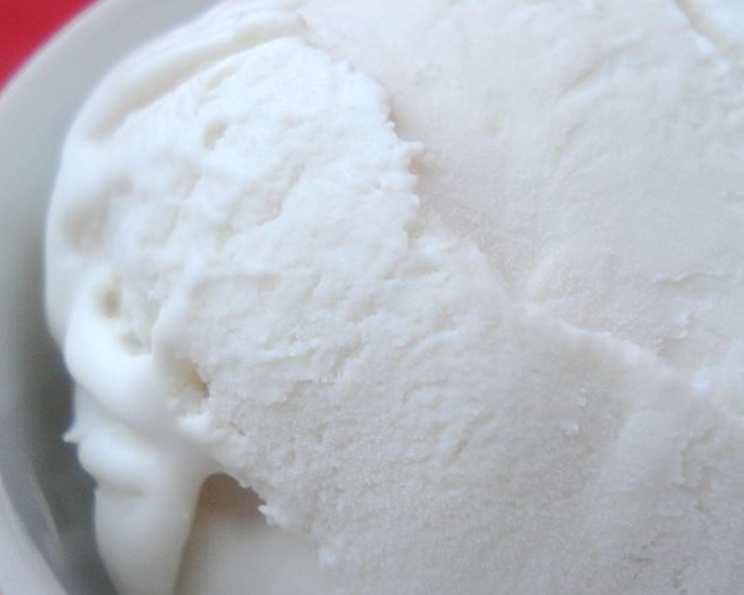
The Ethereal Embrace: Crafting Perfect White Chocolate Ice Cream
There are certain flavors that transport me instantly to childhood summers, to the clinking of ice cream trucks and the sticky sweetness of melted treats on warm asphalt. White chocolate, in its creamy, unadulterated form, holds a special place in that nostalgic pantheon. It’s not just a flavor; it’s a feeling of pure, unadulterated indulgence. I remember one particularly sweltering July afternoon, visiting my grandmother. She, a woman of quiet culinary prowess, surprised us with a homemade white chocolate ice cream, its pristine hue a stark contrast to the vibrant berries she served alongside. That first spoonful was like biting into a cloud – impossibly smooth, delicately sweet, and utterly captivating. It’s a memory that has guided my own pursuit of ice cream perfection ever since.
Recipe Overview
- Prep Time: 15 minutes
- Cook Time: 30 minutes
- Total Time: 45 minutes (plus chilling and freezing time)
- Servings: 6-8
- Yield: 1 quart
- Dietary Type: Dairy, Eggs
Ingredients
- 1 cup whole milk
- 2 large eggs
- 12 ounces premium white chocolate, finely chopped
- 1 ½ cups heavy cream
- 1 teaspoon pure vanilla extract
Equipment Needed
- Heavy medium-size saucepan
- Medium mixing bowl
- Whisk
- Fine-mesh strainer
- Large, clean bowl
- Ice cream maker
- Freezer-safe container
Instructions
The journey to this luscious white chocolate ice cream begins with a foundational custard, a technique as classic as it is rewarding.
-
Begin by warming the milk. Pour the 1 cup of whole milk into a heavy medium-size saucepan. Place it over medium heat and bring it just to a simmer. You’ll see small bubbles forming around the edges, but avoid a rolling boil.
-
While the milk is warming, prepare your eggs. In a medium mixing bowl, whisk the 2 large eggs until they are well combined and their color is uniform.
-
This next step is crucial for tempering the eggs: temper. Slowly and gradually, ladle about half of the hot milk into the beaten eggs while continuously whisking. This gentle introduction of heat will prevent the eggs from scrambling.
-
Once the eggs are tempered, pour the entire mixture back into the saucepan with the remaining milk. Return the saucepan to the stove over low heat.
-
Now, it’s time to develop that creamy custard base. Stir constantly with a whisk – this is non-negotiable. Continue stirring until the custard slightly thickens enough to coat the back of a spoon. Be incredibly careful not to let the mixture boil, as this will cause the eggs to scramble and ruin the smooth texture you’re aiming for. The goal is a delicate consistency, not a thick, lumpy sauce.
-
Remove the custard from the heat immediately once it has reached the desired thickness. Stir in the 12 ounces of finely chopped white chocolate. Keep stirring until the white chocolate is completely melted and fully incorporated into the warm custard, creating a silken, homogenous base.
-
For an ultra-smooth finish, pour the hot custard through a strainer into a large, clean bowl. This will catch any potential bits of cooked egg, ensuring absolute silkiness.
-
Allow the custard to cool slightly at room temperature. Once it’s no longer steaming intensely, stir in the 1 ½ cups of heavy cream and the 1 teaspoon of pure vanilla extract. The vanilla extract will enhance the delicate sweetness of the white chocolate and add a layer of aromatic complexity.
-
For the best flavor and texture development, cover the bowl and refrigerate the mixture until thoroughly cold, or preferably overnight. This chilling period is essential for the flavors to meld and for the base to be the correct temperature for churning.
-
When you’re ready to churn, give the chilled mixture a final stir. Then, freeze it in 1 or 2 batches (depending on the capacity of your ice cream maker) according to the manufacturer’s directions. The churning process incorporates air and creates the characteristic smooth, frozen texture of ice cream.
-
Once churned, you have a decision to make. You may eat the ice cream immediately for a softer, softer-serve consistency, or for a firmer, scoopable texture, transfer it to a freezer-safe container and freeze for at least two hours.
Expert Tips & Tricks
The beauty of white chocolate ice cream lies in its simplicity, but a few thoughtful touches can elevate it from good to extraordinary.
- The Quality of White Chocolate Matters: This is non-negotiable. Use a good-quality white chocolate bar, not chocolate chips. Chocolate chips often contain stabilizers that can affect the melt and texture. Look for white chocolate that lists cocoa butter as one of its primary ingredients.
- Don’t Rush the Chilling: Allowing the custard to chill completely, ideally overnight, allows the fats in the cream and chocolate to firm up and the flavors to marry. This leads to a richer, more intensely flavored ice cream.
- Strain, Strain, Strain: Don’t skip the straining step. Even with careful tempering, the slightest over-heating can result in tiny bits of egg. Straining ensures that glorious, uninterrupted silkiness.
- Avoid Over-Churning: Once the ice cream reaches a soft-serve consistency, it’s ready to be transferred. Over-churning can lead to an icy texture.
Serving & Storage Suggestions
This ethereal white chocolate ice cream is a star on its own, but it also plays beautifully with others. Serve it chilled from the freezer.
- On its own: A simple scoop in a chilled bowl or cone is a testament to its pure, delicious flavor.
- With Berries: Fresh raspberries, strawberries, or a mixed berry compote provide a delightful tart contrast to the sweet ice cream.
- With Chocolate: A drizzle of dark chocolate sauce or a scattering of chocolate shavings can amplify the chocolate notes.
- With Cake or Brownies: It’s the perfect accompaniment to a warm slice of chocolate cake or a fudgy brownie, creating a classic dessert pairing.
Storage: Properly stored, this white chocolate ice cream will keep in the freezer for up to 2 weeks. Ensure it’s in an airtight container to prevent freezer burn and the absorption of any unwanted odors. If it hardens significantly, let it sit at room temperature for a few minutes before scooping.
Nutritional Information
| Nutrient | Amount per Serving (approximate) | % Daily Value |
|---|---|---|
| Calories | 370 kcal | 19% |
| Total Fat | 28 g | 36% |
| Saturated Fat | 18 g | 90% |
| Cholesterol | 110 mg | 37% |
| Sodium | 75 mg | 3% |
| Total Carbohydrate | 25 g | 9% |
| Dietary Fiber | 0 g | 0% |
| Sugars | 23 g | 46% |
| Protein | 5 g | 10% |
Note: Nutritional values are estimates and can vary based on specific ingredients and portion sizes.
Variations & Substitutions
While the classic white chocolate ice cream is divine, there are always ways to introduce delightful variations.
- White Chocolate Raspberry Swirl: Once the ice cream is churned, gently swirl in a raspberry coulis or puree before transferring it to the freezer to firm up.
- White Chocolate Macadamia Nut: Fold in toasted, chopped macadamia nuts during the last few minutes of churning or when transferring to the freezer.
- Citrus Zest Infusion: Add a bit of finely grated lemon or orange zest to the milk as it heats, and strain it out before tempering the eggs for a bright, subtle citrus note that beautifully complements the white chocolate.
FAQs (Frequently Asked Questions)
Q: Why did my custard scramble?
A: This usually happens when the milk is added too quickly to the eggs without constant whisking, or if the custard is heated too rapidly. Always temper the eggs slowly and cook over low heat, stirring constantly.
Q: Can I make this without an ice cream maker?
A: Yes, while an ice cream maker yields the best texture, you can achieve a good result using the “no-churn” method. Freeze the chilled base in a shallow container, stirring vigorously with a fork every 30-45 minutes for the first 3-4 hours of freezing to break up ice crystals.
Q: What’s the best way to chop white chocolate?
A: Use a sharp chef’s knife and chop it on a cutting board. Aim for pieces that are roughly the same size for even melting.
Q: Can I use milk chocolate or dark chocolate instead?
A: You absolutely can! The process would be the same, but the flavor profile will, of course, change significantly. Darker chocolates may require slightly more attention when melting to avoid scorching.
Q: How long does the ice cream need to freeze after churning?
A: For a firm, scoopable texture, it needs at least 2 hours in the freezer. For a truly hard, dense ice cream, 4-6 hours or overnight is recommended.
There’s a profound satisfaction in creating something so utterly delightful from scratch. This white chocolate ice cream is more than just a dessert; it’s an invitation to slow down, savor the moment, and indulge in a little bit of pure, creamy joy. Serve it at your next gathering, or simply treat yourself after a long day. The sublime sweetness and velvety texture are sure to bring a smile.