
The Dreamiest White Chocolate Pound Cake with White Chocolate Icing
There are certain desserts that just feel like a warm hug. For me, that’s a perfectly executed pound cake. I remember my grandmother, a woman whose kitchen was always filled with the comforting aroma of baking, making a white chocolate pound cake that was so sublime, it felt like a special occasion every time it graced her table. The crumb was dense yet tender, and the subtle sweetness of the white chocolate wasn’t just in the cake itself but echoed beautifully in the glossy, rich icing. It’s a recipe that transports me back to those cherished moments, a testament to the simple joy found in well-loved, classic bakes.
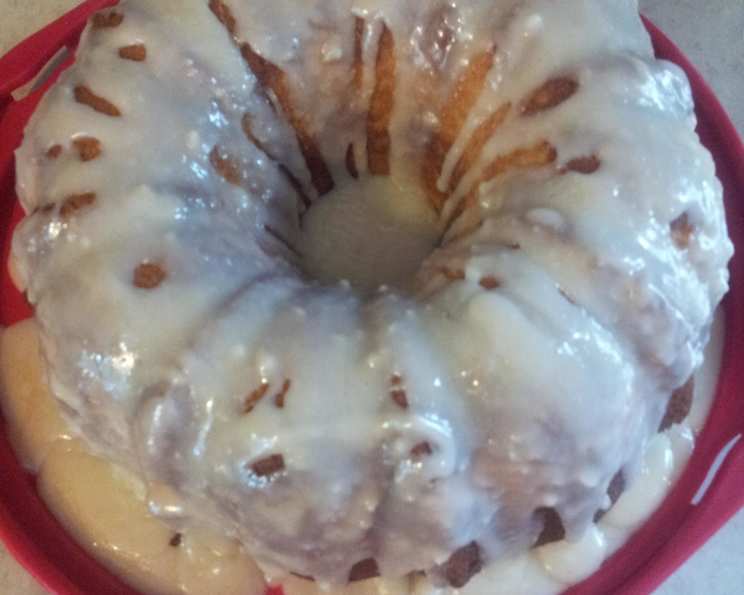
This particular iteration, adapted from a treasured source, captures that same magic. It’s a cake that’s both elegant enough for a tea party and comforting enough for a quiet afternoon treat. The secret lies in the careful balance of rich white chocolate, tender crumb, and a decadent, luscious white chocolate icing that drapes over the sides like a silken blanket.
Recipe Overview
- Prep Time: 15 minutes
- Cook Time: 1 hour
- Total Time: 1 hour 15 minutes (plus cooling time)
- Servings: 12
- Yield: 1 (10-inch tube or bundt) cake
- Dietary Type: Classic Bake
Ingredients
This recipe calls for a few key ingredients to achieve its signature flavor and texture. Ensure you have good quality white chocolate for both the cake and the icing, as it will be the star of the show.
For the White Chocolate Pound Cake:
- 1 cup evaporated milk
- 4 ounces (1/3 cup) white chocolate baking squares, chopped
- 1 cup butter, softened
- 1 2⁄3 cups sugar
- 5 large eggs
- 2 3⁄4 cups all-purpose flour
- 1⁄2 teaspoon baking soda
- 1⁄2 teaspoon salt
For the White Chocolate Icing:
- 3 ounces (1/4 cup) white chocolate baking squares, chopped
- 1⁄4 cup butter
- 2 cups confectioners’ sugar
- 1⁄2 teaspoon vanilla extract
- 1-2 tablespoons milk (whole or 2% recommended for richness)
Equipment Needed
To bring this delightful cake to life, you’ll need a few essential kitchen tools:
- Heavy-bottomed saucepan (for melting chocolate mixtures)
- Electric mixer (stand or hand mixer)
- Large mixing bowls
- Whisk
- Spatula
- Measuring cups and spoons
- A greased and floured 10-inch tube or bundt pan
- Wire cooling rack
Instructions
Crafting this white chocolate pound cake is a straightforward process, but paying attention to each step will yield a truly spectacular result.
-
Melt the White Chocolate for the Cake: In a heavy saucepan, combine the 1 cup evaporated milk and the 4 ounces (1/3 cup) chopped white chocolate baking squares. Place the saucepan over low heat. Cook and stir continuously until the white chocolate is completely melted and the mixture is smooth and well combined. Once melted, remove from heat and allow to cool to room temperature. This step is crucial; adding a warm chocolate mixture to your batter can affect the texture.
-
Cream Butter and Sugar: In a large mixing bowl, cream together the softened butter and sugar using an electric mixer. Beat on medium-high speed until the mixture is light and fluffy, typically about 3-5 minutes. This process incorporates air, which contributes to the cake’s tender crumb.
-
Incorporate Eggs: Add the 5 large eggs to the creamed butter and sugar mixture, one at a time. Beat well after each addition, ensuring each egg is fully incorporated before adding the next. This gradual addition helps to emulsify the batter and prevent it from becoming greasy.
-
Combine Dry Ingredients: In a separate bowl, whisk together the 2 3⁄4 cups all-purpose flour, 1⁄2 teaspoon baking soda, and 1⁄2 teaspoon salt. Whisking ensures that the leavening agent and salt are evenly distributed throughout the flour.
-
Combine Wet and Dry Mixtures: Now, it’s time to bring everything together. Add the dry ingredients to the creamed butter/egg mixture alternately with the cooled white chocolate mixture. Begin and end with the dry ingredients, meaning you’ll add about a third of the flour mixture, mix, then half of the chocolate mixture, mix, another third of the flour, mix, the remaining chocolate mixture, mix, and finally the last of the flour mixture, mixing just until combined. Beat just until combined; overmixing at this stage can develop the gluten in the flour too much, leading to a tough cake.
-
Prepare the Pan: Grease and flour your 10-inch tube or bundt pan thoroughly. This step is vital to ensure the cake releases cleanly after baking. For extra insurance, you can also use a baking spray that contains flour.
-
Pour and Bake: Pour the batter evenly into the prepared pan. Bake in a preheated oven at 325 degrees Fahrenheit (160 degrees Celsius). The baking time will be approximately 1 hour, or until a toothpick inserted near the center comes out clean. Ovens can vary, so start checking around the 50-minute mark. If the top of the cake is browning too quickly, you can loosely tent it with aluminum foil.
-
Cool the Cake: Once baked, remove the cake from the oven. Let it cool in the pan for 10 minutes before carefully inverting it onto a wire rack. Allow the cake to cool completely before attempting to ice it. Trying to ice a warm cake will result in the icing melting and sliding off.
-
Prepare the White Chocolate Icing: While the cake is cooling, prepare the luscious white chocolate icing. In a heavy saucepan, melt the 3 ounces (1/4 cup) chopped white chocolate baking squares and the 1⁄4 cup butter over low heat. Stir often until the mixture is completely blended and smooth.
-
Finish the Icing: Remove the saucepan from the heat. Stir in the 2 cups confectioners’ sugar and the 1⁄2 teaspoon vanilla extract. Add 1 to 2 tablespoons of milk, adding the milk gradually, until you achieve your desired consistency – it should be pourable but thick enough to coat the cake.
-
Ice the Cake: Once the cake is completely cool, drizzle the prepared icing over the top, allowing it to drip down the sides. You can use a spoon or a piping bag for a more controlled drizzle.
Expert Tips & Tricks
- Room Temperature is Key: Ensure your butter and eggs are truly at room temperature. This allows them to emulsify properly, creating a smoother batter and a lighter crumb.
- Don’t Overmix: As mentioned in the instructions, overmixing the flour can lead to a tough pound cake. Mix just until the ingredients are combined.
- Quality White Chocolate Matters: Since white chocolate is a primary flavor here, opt for good quality baking bars rather than chips, as chips often contain stabilizers that can affect texture.
- Cooling is Crucial: Resist the urge to ice a warm cake. Patience here ensures a beautiful, non-messy presentation.
- Bundt Pan Perfection: For a perfect release from a bundt pan, ensure every nook and cranny is greased and floured. A pastry brush is excellent for this.
Serving & Storage Suggestions
This White Chocolate Pound Cake is divine served simply as is, allowing its rich flavor to shine. However, it’s also wonderful accompanied by fresh berries like raspberries or strawberries, a dollop of lightly sweetened whipped cream, or even a scoop of vanilla bean ice cream for an indulgent dessert.
Leftovers can be stored at room temperature in an airtight container for up to 2 days, provided your kitchen is not overly warm. For longer storage, the cake can be refrigerated in an airtight container for up to 5 days. If refrigerated, allow the cake to come to room temperature for about 30 minutes before serving for the best texture. The cake also freezes beautifully; wrap it tightly in plastic wrap, then in aluminum foil, and freeze for up to 3 months. Thaw overnight at room temperature.
Nutritional Information
(Please note: Nutritional information is an estimate and can vary based on specific ingredients and brands used.)
| Nutrient | Amount per Serving | % Daily Value |
|---|---|---|
| Calories | 608 kcal | 30% |
| Total Fat | 28.4 g | 44% |
| Saturated Fat | 17 g | 85% |
| Cholesterol | 138.1 mg | 46% |
| Sodium | 386.8 mg | 16% |
| Total Carbohydrate | 81.7 g | 27% |
| Dietary Fiber | 0.8 g | 3% |
| Sugars | 57.2 g | 114% |
| Protein | 8.2 g | 16% |
Variations & Substitutions
- Citrus Zest: Add the zest of one lemon or orange to the batter for a bright, zesty counterpoint to the sweet white chocolate.
- Nutty Addition: Fold in 1/2 cup of chopped toasted almonds or macadamia nuts into the batter for added texture and flavor.
- Dark or Milk Chocolate: While this is a white chocolate cake, you could substitute some of the white chocolate in the cake batter with dark or milk chocolate chips for a different flavor profile.
FAQs
Q: Why is my pound cake dry?
A: Dryness is often due to overbaking or using too much flour. Ensure you bake until a toothpick comes out clean but don’t continue baking past that point. Accurate flour measurement (spooned and leveled, not scooped) is also key.
Q: My white chocolate icing is too thick, what can I do?
A: If your icing is too thick, gradually add more milk, a teaspoon at a time, stirring well after each addition until you reach a pourable consistency.
Q: Can I use chocolate chips instead of baking squares?
A: While you can, baking squares are generally preferred for their texture and melting properties. If using chips, ensure they are high-quality white chocolate chips and be aware that the texture of the cake might be slightly different.
Q: How should I store the cake if I don’t plan to eat it all within a few days?
A: For longer storage, this cake freezes exceptionally well. Wrap it tightly in plastic wrap, then foil, and freeze for up to 3 months.
Q: Is it necessary to cool the chocolate mixture before adding it to the batter?
A: Yes, it is very important. A hot chocolate mixture can cook the eggs prematurely, leading to a less desirable cake texture.
Final Thoughts
This White Chocolate Pound Cake with White Chocolate Icing is more than just a dessert; it’s an experience. It’s the kind of cake that brings people together, sparking conversations and creating happy memories. Whether you’re a seasoned baker or just starting your culinary journey, I encourage you to give this recipe a try. The aroma that will fill your kitchen as it bakes is simply divine, and the taste is pure, unadulterated bliss. Serve it at your next gathering, or simply treat yourself to a slice with a cup of good coffee or tea. I’d love to hear about your baking adventures with this recipe!