
The Ethereal Delight: White Chocolate Raspberry Cake
There are some cakes that simply sing. They’re not just desserts; they’re edible poetry, a symphony of flavors and textures that transport you to cherished memories. For me, this White Chocolate Raspberry Cake is one such creation. I recall a rainy afternoon years ago, the kind that demands comfort food and a touch of indulgence. I pulled out a simple box of white cake mix, a few pantry staples, and a vision of sweet-tart raspberries and creamy white chocolate. The result was a revelation – a cake so beautifully balanced, so wonderfully moist, and utterly delightful, it instantly became a treasured recipe, a testament to how humble beginnings can lead to extraordinary culinary moments.
Recipe Overview
- Prep Time: 20 minutes
- Cook Time: 25 minutes
- Total Time: 45 minutes (plus cooling and frosting time)
- Servings: 12
- Yield: 1 (9-inch) cake and cupcakes
- Dietary Type: Classic
Ingredients
This recipe, a clever transformation of a boxed cake mix, relies on a few key additions to elevate it to something truly special. The magic lies in the combination of rich white chocolate, vibrant raspberries, and a luscious frosting.
For the Cake:
- 1 (15 ¼ ounce) box white cake mix
- 1 ¼ cups water
- ⅓ cup oil (vegetable or canola oil work beautifully)
- 2 large eggs
- 4 ounces white chocolate, melted
For the Glaze:
- ¼ cup raspberry jam or preserves (ensure it’s smooth; you may need to strain it if it contains large fruit pieces)
For the Frosting:
- 1 (15 ounce) can vanilla frosting (store-bought is perfectly fine for this recipe’s intended ease)
- 4 ounces white chocolate, melted
- 1 teaspoon vanilla extract
- 8 ounces frozen whipped topping, thawed (such as Cool Whip)
For the Topping:
- 1 cup fresh raspberries
- ½ – 1 cup white chocolate curls (for garnish)
Equipment Needed
- Mixing bowls (at least two)
- Electric mixer (stand mixer or hand mixer)
- One 9-inch cake pan
- Measuring cups and spoons
- Rubber spatula
- Whisk
- Cooling rack
- Pastry brush (for applying the glaze)
- Vegetable peeler (for making white chocolate curls)
- Baking sheet (optional, for catching drips when melting chocolate)
Instructions
This cake is designed for delightful simplicity, bringing together familiar ingredients in a way that feels both comforting and sophisticated. The process is straightforward, but attention to detail ensures a beautiful final product.
-
Preheat and Prepare: Begin by preheating your oven to 325°F (160°C). Thoroughly grease and flour one 9-inch cake pan. This essential step ensures your cake releases cleanly. It’s worth noting that this recipe will yield more batter than fits in a standard 9-inch pan, so have a few cupcake liners ready to go for any extra batter – a delightful bonus!
-
Mix the Cake Batter: In a large mixing bowl, combine all the cake ingredients: the white cake mix, water, oil, and eggs. Add the melted white chocolate. Using your electric mixer, blend these ingredients on low speed until they are just combined. Increase the speed to medium and beat for approximately 2 minutes. Scrape down the sides of the bowl with your rubber spatula to ensure all ingredients are incorporated, then beat for about 1 more minute. This ensures a smooth, well-emulsified batter.
-
Bake the Cake: Pour the batter into the prepared 9-inch cake pan. If you have extra batter, fill your cupcake liners about two-thirds full. Bake the cake in the preheated oven for 23–25 minutes, or until a wooden skewer or toothpick inserted into the center comes out clean. For cupcakes, begin checking for doneness around 18–20 minutes.
-
Cool the Cake: Once baked, carefully remove the cake from the oven. Let it cool in the pan on a wire rack for about 10–15 minutes. Then, invert the cake onto the wire rack to cool completely. It’s crucial that the cake is entirely cool before proceeding to the next step.
-
Apply the Glaze: While the cake is cooling, prepare the glaze. Gently melt the raspberry jam or preserves in a small microwave-safe bowl in 15-second intervals, stirring in between, until it’s a smooth, brushable consistency. Once the cake has cooled completely, use a pastry brush to generously brush the melted raspberry glaze over the entire surface of the cooled cake. This adds a beautiful sheen and a burst of tartness that perfectly complements the sweet white chocolate.
-
Prepare the Frosting: In a separate clean bowl, combine the vanilla frosting, the melted white chocolate, and the vanilla extract. Using your electric mixer, mix these ingredients until they are thoroughly combined and the frosting is smooth and creamy. Gently fold in the thawed whipped topping until just incorporated. Be careful not to overmix, as this can deflate the whipped topping.
-
Frost the Cake: Spread the frosting generously over the glazed cake, ensuring an even layer. You can create swirls or peaks with your spatula for a more decorative finish.
-
Create White Chocolate Curls: To make the white chocolate curls, take a block of white chocolate and use a vegetable peeler to scrape down the side. This will create delicate, elegant curls. You may need to warm the chocolate slightly in your hands if it’s too firm.
-
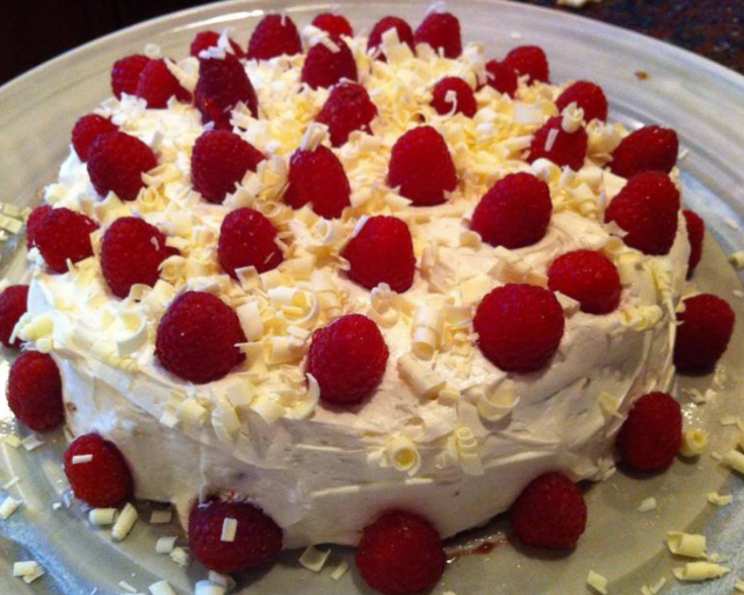
Decorate and Serve: Dot the top of the frosted cake with fresh raspberries. Then, generously sprinkle the cake with the white chocolate curls, allowing them to cascade down the sides for a stunning presentation.
Expert Tips & Tricks
- Melting White Chocolate: When melting white chocolate, do so gently. You can use a double boiler or the microwave on 50% power in 30-second intervals, stirring frequently. White chocolate can seize easily if overheated.
- Glaze Consistency: If your raspberry jam is too thick to brush, you can add a teaspoon or two of water or raspberry liqueur to thin it out.
- Frosting Texture: The combination of canned frosting and whipped topping creates a light and airy frosting that’s easy to work with. For a firmer frosting, you could omit the whipped topping and simply use more melted white chocolate folded into the vanilla frosting.
- Making Ahead: The cake layers can be baked a day in advance and stored at room temperature, well-wrapped, once completely cooled. The frosting can also be made ahead and refrigerated, but you may need to let it soften slightly and re-whisk before frosting.
Serving & Storage Suggestions
This White Chocolate Raspberry Cake is best served at room temperature. The flavors are more vibrant and the texture is at its peak when not chilled. If you need to store leftovers, wrap the cake tightly in plastic wrap and then aluminum foil, and keep it at room temperature for up to two days. For longer storage, you can refrigerate the cake. However, allow it to come back to room temperature for at least 30 minutes before serving to enjoy its optimal flavor and texture. It will keep in the refrigerator for up to 4 days. While freezing is possible, it can affect the texture of the frosting and cake.
Nutritional Information
Here is an approximate nutritional breakdown for this delightful cake:
| Nutrient | Amount per Serving | % Daily Value |
|---|---|---|
| Calories | 555.5 kcal | N/A |
| Calories from Fat | 247 kcal | N/A |
| Total Fat | 27.5 g | 42% |
| Saturated Fat | 10.5 g | 52% |
| Cholesterol | 35 mg | 11% |
| Sodium | 342.9 mg | 14% |
| Total Carbohydrate | 73.9 g | 24% |
| Dietary Fiber | 1.1 g | 4% |
| Sugars | 61.5 g | 123% |
| Protein | 4.2 g | 8% |
Note: Nutritional values are estimates and can vary based on specific ingredients used.
Variations & Substitutions
- Dark or Milk Chocolate: While white chocolate is key to the name, feel free to experiment with dark or milk chocolate for melting into the batter or frosting. This will, of course, change the flavor profile significantly.
- Other Berries: If raspberries aren’t in season or you prefer another fruit, strawberries or blueberries would also make beautiful and delicious additions to the topping.
- Lemon Zest: For an extra layer of brightness, consider adding the zest of one lemon to the cake batter. It pairs wonderfully with both white chocolate and raspberry.
- Gluten-Free: For a gluten-free version, you can substitute the white cake mix with a gluten-free white cake mix. Ensure all other ingredients are also gluten-free.
FAQs
Q: Can I make this cake in a different-sized pan?
A: Yes! If you’re serving a larger crowd, you can bake the cake in a 13” x 9” rectangular pan. You will also need to double the amount for the frosting to adequately cover it.
Q: Why is my white chocolate seizing when I try to melt it?
A: White chocolate is sensitive to moisture and heat. Ensure your bowl and utensils are completely dry, and melt it gently over low heat or in short microwave intervals, stirring often.
Q: How do I prevent the whipped topping from making the frosting too thin?
A: Ensure the whipped topping is fully thawed but still cold when you fold it into the frosting. Overmixing can also lead to a thinner consistency.
Q: Can I use fresh raspberries for the glaze instead of jam?
A: While you could purée fresh raspberries and strain them, using jam or preserves ensures a smoother, more consistent glaze that’s easier to brush on.
Q: How many cupcakes does the extra batter make?
A: The extra batter typically yields about 12-18 cupcakes, depending on how full you fill the liners.
A Sweet Finale
This White Chocolate Raspberry Cake is more than just a dessert; it’s an invitation to celebrate the simple joys. It’s a testament to how a few carefully chosen ingredients, elevated by thoughtful preparation, can create something truly memorable. Whether you’re baking it for a special occasion or simply to brighten an ordinary day, I encourage you to embrace the process and savor the results. Pair a slice with a cup of freshly brewed coffee or a delicate sparkling wine for an experience that’s simply divine. Happy baking!