
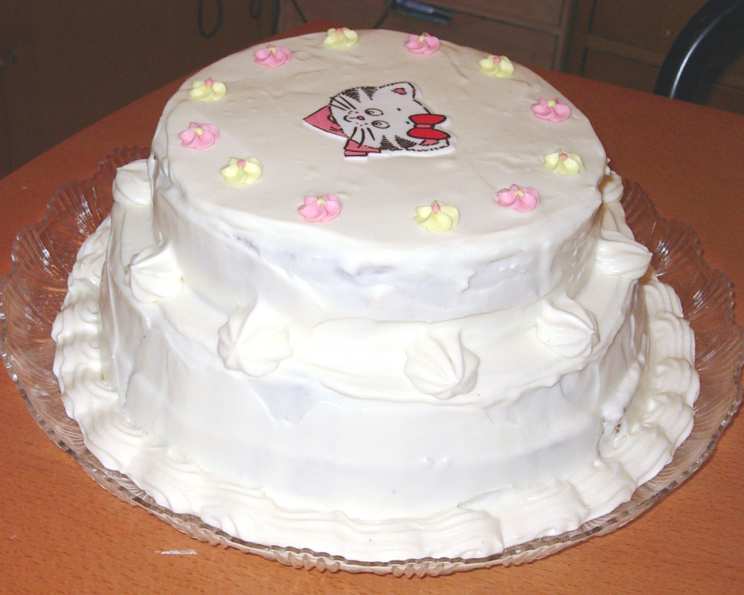
The Dreamy White Chocolate Wedding Cake: A Celebration of Sweet Beginnings
The scent of melting white chocolate, the subtle hum of the mixer, and the sheer joy of creating something beautiful for a milestone – these are the memories that flood back whenever I think of this White Chocolate Wedding Cake. I remember the nervous excitement, the meticulous layering, and the absolute thrill of seeing my creation take center stage on my own wedding day. It wasn’t just a cake; it was a labor of love, a testament to the fact that heartfelt homemade goodness can indeed rival, and even surpass, anything shop-bought. The compliments poured in, and the disbelief that I’d made it myself only sweetened the victory. This recipe, with its rich, moist crumb and luscious white chocolate frosting, is designed to bring that same magic to your special occasions, no matter how many tiers you’re aiming for.
Recipe Overview
Here’s a snapshot of what you need to know before you begin:
- Prep Time: Approximately 2 hours (including frosting chilling time)
- Cook Time: 1 hour 50 minutes per cake
- Total Time: Approximately 4 hours 30 minutes (excluding cooling and stacking)
- Servings: 36 (based on the original recipe serving size for 3 cakes)
- Yield: 3 x 20cm round cakes, enough to stack and frost
- Dietary Type: Contains dairy, eggs, and gluten
Ingredients
This recipe is designed to be scaled. The cake ingredients are for one cake, and the frosting is ample for three.
For the Cakes (Multiply as needed for each cake layer)
- Butter, for greasing
- 200 g white chocolate, finely chopped
- 250 g butter, chopped
- 2 cups caster sugar
- 1/2 cup milk
- 1 orange, zest finely grated
- 1 3/4 cups plain flour
- 1/2 cup self-raising flour
- 1/3 cup Grand Marnier (or Cointreau, as I preferred for its slightly brighter citrus note)
- 2 large eggs, lightly beaten
For the Frosting (Enough to cover three stacked cakes)
- 400 g white chocolate, finely chopped
- 500 g cream cheese, softened and chopped
- 2 cups powdered sugar icing (also known as confectioners’ sugar or icing sugar), sifted
- 600 ml thickened cream
Equipment Needed
To bring this beautiful cake to life, you’ll need a few key pieces of equipment:
- 3 x deep, round, 20cm cake tins
- Baking paper
- Saucepan
- Large mixing bowl
- Whisk
- Sieve
- Oven
- Wire cooling racks
- Heatproof bowl (for melting chocolate)
- Small bowl (for electric mixer)
- Electric mixer (handheld or stand mixer)
- Spatula
- Serving board or cake stand
- Wooden skewers
Instructions
Crafting this wedding cake is a process that rewards patience and attention to detail. I recommend preparing the cakes over two days for a less stressful wedding morning.
-
Prepare the Cake Tins: Begin by greasing and lining the base and sides of three deep, round, 20cm cake tins with baking paper. This step is crucial to prevent any sticking and ensure easy removal of the delicate cake layers.
-
Preheat the Oven: Preheat your oven to 160°C (320°F). This moderate temperature is ideal for ensuring the cakes bake through evenly without burning.
-
Melt the Cake Base: In a saucepan, combine the 200g of chopped white chocolate, 250g of chopped butter, 2 cups of caster sugar, and 1/2 cup of milk. Stir gently over medium heat until all ingredients are melted and well combined into a smooth, luscious mixture.
-
Cool the Chocolate Mixture: Transfer the melted chocolate mixture into a large bowl. Allow it to cool slightly. This is important so that the heat doesn’t cook the eggs when you add them in the next step.
-
Create the Batter: Using a whisk, stir in the finely grated orange zest, the sifted plain flour and self-raising flour, the Grand Marnier, and the lightly beaten eggs into the slightly cooled chocolate mixture. Continue to whisk until you achieve a wonderfully smooth batter. The orange zest will lend a subtle, sophisticated perfume that beautifully complements the sweetness of the white chocolate.
-
Bake the First Cake: Pour the batter into one of the prepared tins. Bake in the preheated oven for 1 hour and 50 minutes, or until a skewer inserted into the centre of the cake comes out clean. The long baking time is necessary for these deep cakes to cook through thoroughly.
-
Prevent Over-Browning: Cover the cake with foil halfway through baking to prevent the top from over-browning before the inside is cooked. This simple trick ensures a beautiful, even golden hue.
-
Cool the Cake: Once baked, allow the cake to cool in its tin for a while before carefully inverting it onto a wire cooling rack to cool completely.
-
Repeat for Remaining Cakes: Repeat steps 3 through 8 for the remaining two cakes. If you choose to bake two cakes simultaneously, you may find you need to extend the cooking time slightly, as ovens can vary. Ensure each cake is fully baked and cooled before proceeding.
-
Prepare the Frosting – Melt Chocolate: To make the frosting, melt the 400g of chopped white chocolate in a heatproof bowl set over a pan of simmering water (a bain-marie). Ensure the bottom of the bowl does not touch the water. Leave to cool once melted.
-
Prepare the Frosting – Cream Cheese Mixture: In the small bowl of an electric mixer, place half of the cream cheese and half of the sifted powdered sugar icing. Beat until just smooth. Add the remaining cream cheese and remaining icing sugar and beat again until thoroughly smooth. This ensures a lump-free base for your frosting.
-
Combine Frosting Ingredients: Pour in the cooled melted white chocolate and beat until it is fully combined with the cream cheese mixture.
-
Whip the Cream: In a separate, clean bowl, whip the 600ml of thickened cream until soft peaks form. This means the cream holds its shape but the tip curls over.
-
Fold the Cream: Gently fold the whipped cream through the cream cheese and chocolate mixture using a spatula until just combined. Be careful not to overmix, as this can deflate the cream.
-
Chill the Frosting: Cover the frosting mixture and refrigerate for 1-2 hours, or until it is firm enough to spread. This chilling period is essential for achieving the correct consistency for frosting.
-
Prepare Frosting for Spreading: After refrigeration, you may need to stir the mixture until it is smooth again before spreading. This ensures a beautiful, even finish on your cake.
-
Assemble the Wedding Cake: To form the wedding cake structure, stack the cooled cakes on your serving board or plate. Sandwich them together with approximately 1/4 cup of the frosting between each layer.
-
Create a Flat Surface: Make sure the last cake is inverted so that its base is facing upwards. This will provide a completely flat surface for frosting the top tier.
-
Secure the Layers: To provide stability for a stacked cake, secure the layers in place by inserting 3 wooden skewers vertically through all the cakes. Cut the skewers down to size so that they can be frosted over and are not visible.
-
Frost the Stacked Cakes: Cover the entire stacked cake with the remaining frosting. Work your way around, smoothing the frosting to create a professional finish.
-
Serving the Cake: When it’s time to serve, carefully separate the stacked cakes back into their individual layers. Remove the skewers before slicing and serving. This step allows for easier handling and serving of individual portions.
Important Note: This cake can be iced the day before you plan to serve it, and refrigerated. For a truly make-ahead option, the un-iced cakes can be made up to 3 months in advance and frozen. Ice them on the day of your event for the freshest taste and appearance.
Expert Tips & Tricks
- Chocolate Quality Matters: For a truly exceptional white chocolate flavour, use a good quality white chocolate. The difference in taste and texture is significant.
- Room Temperature Ingredients for Frosting: Ensure your cream cheese is at room temperature for the frosting. This will make it much easier to beat smooth and prevent lumps.
- Gentle Folding: When folding the whipped cream into the chocolate mixture, use a light hand. Overmixing can knock the air out of the cream, resulting in a denser frosting.
- Testing for Doneness: The skewer test is your best friend. If it comes out with any wet batter, continue baking. A few moist crumbs are perfectly fine.
- Cooling is Key: Resist the urge to stack or frost warm cakes. They need to be completely cool to prevent the frosting from melting and the cake from collapsing.
Serving & Storage Suggestions
This White Chocolate Wedding Cake is a showstopper in itself, but can be enhanced with simple accompaniments. Serve slices with fresh berries, a delicate raspberry coulis, or a dusting of edible glitter for that extra bridal sparkle.
- Room Temperature: If iced on the day, the cake can be served at room temperature. It will keep well at room temperature for up to 2 days, provided it is kept in a cool, dry place.
- Refrigeration: If iced the day before, refrigerate the cake. When ready to serve, allow it to sit at room temperature for at least 30-60 minutes to soften slightly for optimal texture and flavour. The cake will keep in the refrigerator for up to 5 days once frosted.
- Freezing: As mentioned, un-iced cake layers can be frozen for up to 3 months. Thaw them completely at room temperature before frosting.
Nutritional Information
While the exact nutritional breakdown can vary based on specific ingredient brands and portion sizes, here’s an estimated nutritional profile per serving of this rich White Chocolate Wedding Cake.
| Nutrient | Amount per Serving | % Daily Value |
|---|---|---|
| Calories | 325.5 kcal | – |
| Calories from Fat | 157 kcal | – |
| Total Fat | 17.5 g | 27% |
| Saturated Fat | 10.9 g | 55% |
| Cholesterol | 50.5 mg | 17% |
| Sodium | 85 mg | 4% |
| Total Carbohydrate | 35.4 g | 12% |
| Dietary Fiber | 0.2 g | 1% |
| Sugars | 28.4 g | 31% |
| Protein | 3.1 g | 6% |
(Note: The nutritional information is an estimation and may vary.)
Variations & Substitutions
- Citrus Zest: While orange is delightful, lemon or lime zest can offer a brighter, more zesty counterpoint to the sweetness.
- Liqueur Alternatives: If Grand Marnier or Cointreau aren’t to your liking, a good quality vanilla extract or a hint of almond extract can be used in their place, though you will lose the citrus notes.
- White Chocolate Intensity: For a deeper white chocolate flavour in the cake, consider using a slightly higher percentage of cocoa butter in your white chocolate.
- Dairy-Free/Vegan Adaptations: This recipe is inherently not dairy-free or vegan. Significant recipe development would be required to adapt it successfully, particularly for the frosting.
FAQs
Q: Can I make the cakes ahead of time?
A: Absolutely! The cakes can be baked up to two days in advance, cooled completely, wrapped tightly in plastic wrap, and stored at room temperature. For longer storage, freeze them for up to 3 months.
Q: How do I ensure my frosting is the right consistency for spreading?
A: The key is chilling. If the frosting is too soft, it will be difficult to spread and won’t hold its shape. If it becomes too hard, allow it to sit at room temperature for a few minutes and stir until spreadable.
Q: What if my cake is baking too quickly on top?
A: As mentioned in the instructions, tenting the cake loosely with aluminum foil during the latter half of baking is the best way to prevent over-browning.
Q: Can I make this cake in a different size or shape tin?
A: The baking time will need to be adjusted significantly if using different sized tins. For deeper tins, you’ll likely need longer baking times and potentially a lower oven temperature. For shallower tins, baking time will be reduced.
Q: Is it possible to make the frosting without an electric mixer?
A: While it would be significantly more labor-intensive, it is possible. You would need to vigorously whisk the cream cheese and sugar until smooth, and then whip the cream to soft peaks using a hand whisk, followed by a thorough folding process.
Final Thoughts
There’s a profound satisfaction in creating a wedding cake that not only looks stunning but also tastes utterly divine. This White Chocolate Wedding Cake embodies that sentiment. It’s a recipe that, with a little planning and a lot of love, will undoubtedly become a cherished part of your special memories. Don’t be daunted by its grandeur; break it down step-by-step, and you’ll be rewarded with a cake that speaks volumes of your dedication and affection. I encourage you to try it for your own celebrations, or for those of loved ones. The joy it brings is truly unforgettable, and I’d be delighted to hear about your own experiences crafting this sweet masterpiece.