
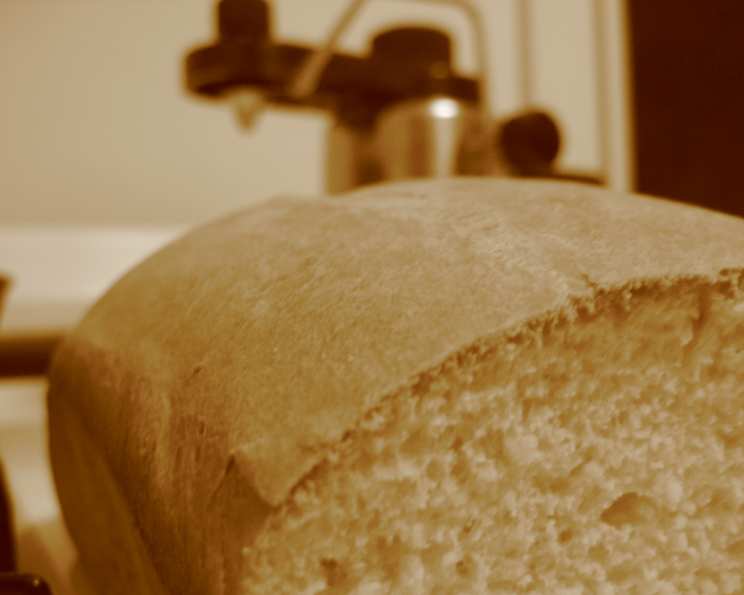
The Quintessential White Sandwich Bread: A Hug in Loaf Form
There’s something profoundly comforting about a perfectly baked loaf of white sandwich bread. It’s a scent that instantly transports me back to my mother-in-law’s kitchen, a place where warmth and love were as abundant as the flour dusting her countertops. She had a knack for creating the most impossibly soft, moist, and fluffy bread, and her recipe for this classic white sandwich bread was her most cherished gift to me. Every time I knead the dough, I feel a connection to her, a sense of carrying on a tradition of simple, honest baking that nourishes both body and soul. This bread isn’t just a recipe; it’s a memory, a feeling, a reminder of the joy found in creating something beautiful from scratch.
Recipe Overview
- Prep Time: Approximately 30 minutes (plus rising time)
- Cook Time: 30 minutes
- Total Time: Approximately 2 hours 30 minutes (including rising)
- Servings: 12-16 slices per loaf
- Yield: 2 loaves (5″X9″)
- Dietary Type: Vegetarian
Ingredients
The beauty of this classic white bread lies in its simplicity. You likely have most of these pantry staples on hand.
- 1 ½ cups water
- ½ cup milk
- 2 tablespoons butter
- 6 – 6 ½ cups all-purpose flour, plus more for dusting
- 3 tablespoons granulated sugar
- 1 ½ teaspoons salt
- 2 ¼ teaspoons active dry yeast
Equipment Needed
While this recipe is quite straightforward, a few key pieces of equipment will make the process smoother:
- A large mixing bowl
- A smaller bowl or liquid measuring cup for warming liquids
- A stand mixer with a dough hook (optional, but highly recommended for kneading)
- Measuring cups and spoons
- Two greased 5″X9″ loaf pans
- A baking sheet (optional, to catch any drips)
- An oven
- A wire cooling rack
Instructions
This recipe is designed to yield two wonderfully soft and yielding loaves, perfect for everything from PB&Js to elegant toast.
-
Activate the Yeast: In a small bowl or liquid measuring cup, combine the 1 ½ cups water and ½ cup milk. Gently warm this mixture until it reaches a temperature between 120°F and 130°F (49°C – 54°C). This temperature is crucial for activating the yeast without killing it. Stir in the 2 ¼ teaspoons yeast and let it sit for about 5-10 minutes, or until it becomes foamy and frothy. This blooming indicates your yeast is active and ready to work its magic.
-
Combine Wet and Dry Ingredients: In the bowl of your stand mixer (or a large mixing bowl if you’re kneading by hand), combine the warmed liquid mixture with the 2 tablespoons butter, 3 tablespoons sugar, and 1 ½ teaspoons salt.
-
Incorporate Flour Gradually: Add 2 cups of the all-purpose flour to the wet ingredients. If using a stand mixer, attach the dough hook and begin mixing on a low speed. Gradually add the remaining flour (starting with about 4 cups) until the dough begins to pull away from the sides of the bowl, but still looks wet. You’ll gradually add more flour as directed in the next steps.
-
Develop the Dough:
- Continue mixing, adding about 1 cup of flour more, or enough to create a thick batter. Beat this for two minutes with your electric mixer.
- Next, add another portion of flour until you achieve a soft dough. This is the stage where the dough will be slightly sticky but manageable. Continue to add flour sparingly until a soft dough forms.
-
Knead the Dough: Turn the dough out onto a lightly floured surface. Knead the dough for 8-10 minutes. If using a stand mixer, continue kneading with the dough hook on medium speed for the same duration. The goal is to develop the gluten, which gives the bread its structure and chew. The dough should become smooth, elastic, and less sticky. You should be able to poke it, and the indentation will slowly spring back.
-
First Rise: Lightly grease your two 5″X9″ loaf pans with butter or cooking spray. Shape the kneaded dough into two evenly sized loaves. Place each loaf into its prepared pan. Cover the pans loosely with plastic wrap or a clean kitchen towel. Let the dough rise in a warm place until doubled in size. This typically takes about 1 to 1 ½ hours, depending on the ambient temperature.
-
Preheat the Oven: While the dough is rising, preheat your oven to 400°F (200°C).
-
Bake the Bread: Once the dough has doubled, place the loaf pans on a baking sheet (this helps catch any potential overflow and makes transferring easier). Bake at 400°F (200°C) for 30 minutes. The loaves should be golden brown on top and sound hollow when tapped on the bottom.
-
Cooling: Carefully remove the loaves from the pans immediately after baking and place them on a wire cooling rack to cool completely. This prevents the bottoms from becoming soggy.
Expert Tips & Tricks
- Temperature is Key: Ensuring your liquid is between 120°F and 130°F is paramount for yeast activation. Too cool and it won’t activate; too hot and you’ll kill it. A kitchen thermometer is your best friend here.
- Don’t Be Afraid of Sticky Dough: When adding flour, it’s better to err on the side of slightly sticky. Over-flouring can lead to a dry, dense loaf. The dough will firm up during kneading.
- Kneading Power: If kneading by hand, use the heel of your hand to push the dough away from you, then fold it back. Repeat this motion consistently. The dough will transform under your hands.
- Warm Rise Environment: A slightly warm oven (turned off, with just the light on), or near a sunny window, is ideal for a consistent rise.
- Checking for Doneness: Besides the hollow sound, you can also use an instant-read thermometer. The internal temperature of the bread should be around 190°F-200°F (88°C-93°C).
Serving & Storage Suggestions
This beautiful white sandwich bread is incredibly versatile. It’s at its absolute best sliced thick and served warm with a generous slather of butter. It makes for the most delightful sandwiches, from classic grilled cheese to delicate tea sandwiches.
Storage:
- Room Temperature: Once completely cooled, store the bread in an airtight container or bread bag at room temperature for 2-3 days.
- Refrigeration: For longer storage, wrap tightly and refrigerate for up to a week. Be aware that refrigeration can sometimes dry out bread.
- Freezing: To freeze, wrap the cooled loaf tightly in plastic wrap, then in aluminum foil or place it in a freezer-safe bag. It will keep well in the freezer for 2-3 months. Thaw at room temperature or gently reheat slices in a toaster or oven.
Nutritional Information
This is an approximate nutritional breakdown per slice, assuming 16 slices per loaf.
| Nutrient | Amount per Slice | % Daily Value |
|---|---|---|
| Calories | ~150 kcal | 8% |
| Total Fat | ~2 g | 3% |
| Saturated Fat | ~1 g | 5% |
| Cholesterol | ~5 mg | 2% |
| Sodium | ~150 mg | 7% |
| Total Carbohydrate | ~27 g | 9% |
| Dietary Fiber | ~1 g | 4% |
| Sugars | ~3 g | 6% |
| Protein | ~4 g | 8% |
Note: Nutritional values are estimates and can vary based on specific ingredients and brands used.
Variations & Substitutions
While the classic is divine, here are a few ways to jazz up your white bread:
- Whole Wheat Blend: Substitute up to 2 cups of the all-purpose flour with whole wheat flour for a nuttier flavor and increased fiber. You might need to adjust the liquid slightly.
- Honey Sweetener: Replace the granulated sugar with honey for a subtle floral note and slightly different texture. Use about ¼ cup of honey and reduce the water slightly.
- Herb Infusion: Knead in finely chopped fresh herbs like rosemary or chives during the last few minutes of kneading for an aromatic twist.
- Seeded Top: Brush the tops of the loaves with a little milk and sprinkle with sesame seeds, poppy seeds, or sunflower seeds before baking.
FAQs
Q: Why is my bread dense instead of fluffy?
A: This is often due to under-proofing (not letting the dough rise enough), over-flouring, or insufficient kneading, which doesn’t develop enough gluten.
Q: Can I use bread flour instead of all-purpose flour?
A: Yes, bread flour has a higher protein content, which can lead to an even chewier texture and better rise. You may need to adjust the amount of flour slightly.
Q: My bread didn’t rise as much as expected. What could have gone wrong?
A: The most common culprits are old or inactive yeast, or liquid that was too hot or too cold when activating the yeast.
Q: How can I get a nice golden-brown crust?
A: Ensuring your oven is preheated correctly and baking at the specified temperature is key. You can also brush the top of the loaf with a little milk or egg wash before baking for extra browning.
Q: How long does the dough need to rise?
A: This can vary greatly depending on the temperature of your kitchen. It generally takes 1 to 1 ½ hours, but the visual cue of doubling in size is the most important indicator.
Final Thoughts
This white sandwich bread is more than just an ingredient; it’s the foundation of countless meals and cherished memories. It’s a testament to the simple pleasures of home baking. So, roll up your sleeves, embrace the joy of kneading, and fill your home with the irresistible aroma of freshly baked bread. I encourage you to share your creations with loved ones and savor every soft, delicious bite. This bread pairs beautifully with a steaming mug of coffee or a glass of cold milk, making it the perfect companion for any time of day.