
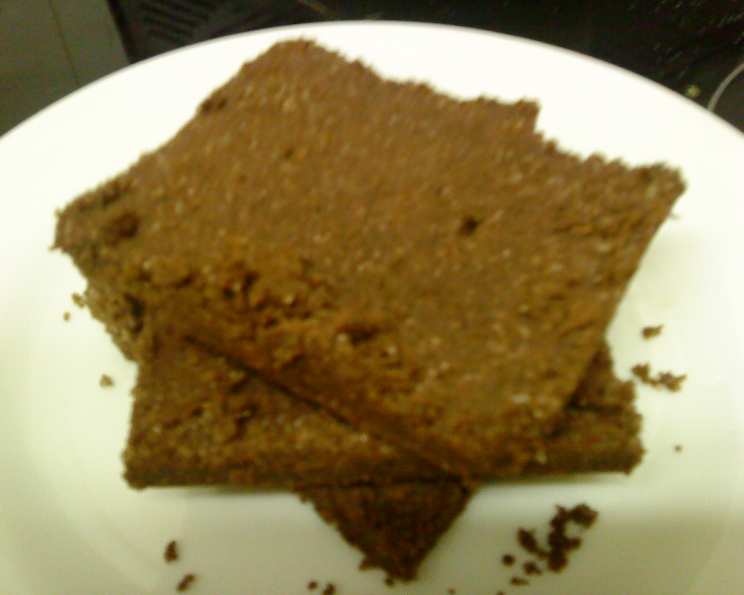
Wicklewood’s Schooldays Chocolate Concrete (Gluten Free)
Ah, the humble school dinner. For many of us, those institutional cafeterias conjure a specific, almost Proustian, memory of food. While the savoury offerings often left much to be desired, there were always a few sweet stars that shone brightly through the utilitarian haze. Chocolate Concrete, with its peculiar name and even more peculiar texture, was one such beacon. It wasn’t fancy, it wasn’t refined, but it was undeniably, gloriously chocolatey, and the thrill of getting a slice was palpable. Recreating that iconic treat, especially in a gluten-free version that doesn’t compromise on that signature crunch, brings back a delightful wave of nostalgia.
Recipe Overview
- Prep Time: 25 minutes
- Cook Time: 20 minutes (plus an additional 5 minutes for gluten-free)
- Total Time: 45 minutes (plus an additional 5 minutes for gluten-free)
- Servings: 4-6
- Yield: 1 9” baking tin
- Dietary Type: Gluten-Free
Ingredients
This recipe is wonderfully straightforward, relying on a few pantry staples to achieve its distinctive character.
- 7 ounces plain gluten-free flour
- 7 ounces granulated sugar
- 4 ounces butter, melted
- 2 ounces cocoa powder
Equipment Needed
The beauty of this dish lies in its simplicity, requiring minimal equipment.
- Mixing bowl
- Measuring spoons and cups
- 9-inch baking tin
- Parchment paper
- Oven
- Cooling rack (optional, for serving cold)
Instructions
This is where the magic truly happens, transforming simple ingredients into a comforting classic.
- Pre-heat your oven to a steady 180°C (350°F / Gas Mark 4). This initial step is crucial for ensuring even baking and that characteristic crisp exterior.
- In a generously sized mixing bowl, combine the plain gluten-free flour, granulated sugar, and cocoa powder. Give these dry ingredients a good whisk or stir to ensure they are thoroughly mixed and there are no pockets of cocoa powder.
- Pour the melted butter into the bowl with the dry ingredients.
- Now, using your fingertips, rub all the ingredients together. Continue this process until the mixture resembles coarse breadcrumbs or a crumble topping. It’s important to achieve this consistent texture, as it’s key to the final “concrete” structure.
- Grease your 9-inch baking tin thoroughly. Line it with parchment paper, ensuring the paper extends slightly up the sides. This makes for easy removal of the finished concrete.
- Pour the crumble mixture into the prepared baking tin. Pat it down firmly and evenly across the base. You want a solid, compressed layer.
- Bake in the pre-heated oven for 20 minutes. For those using gluten-free flour, remember to bake for an additional 5 minutes, bringing the total baking time to 25 minutes. The concrete is ready when the edges appear set and slightly firm.
- Once baked, remove from the oven. The Chocolate Concrete can be served warm for a softer, more fudgy texture, or allowed to cool completely in the tin for that signature hard, brittle crunch.
Expert Tips & Tricks
While this recipe is wonderfully forgiving, a few professional insights can elevate your Chocolate Concrete experience from good to truly great.
- The Importance of the Rubbing Technique: Don’t be tempted to just stir the butter in. The act of rubbing the butter into the dry ingredients coats the flour particles, creating those delightful little clumps that bake into the satisfying texture of the concrete. Ensure your butter is melted but not piping hot, as very hot butter can start to cook the flour prematurely.
- Achieving the Perfect Crunch: For the ultimate “concrete” experience, allow the bake to cool completely in the tin. As it cools, it will firm up considerably. If you’re impatient (and who can blame you?), a brief stint in the refrigerator can accelerate this process and enhance the crispness.
- Gluten-Free Flour Nuances: The instruction to add an extra ounce of butter and extend the baking time for gluten-free flour is critical. Gluten-free flours can sometimes be a little drier and absorb moisture differently. The extra fat helps bind the ingredients and maintain a pleasant texture, while the extended bake ensures it’s cooked through without becoming gummy.
- Cocoa Quality Matters: While this is a simple, nostalgic bake, using a good quality cocoa powder will make a noticeable difference to the depth of chocolate flavour. Dutch-processed cocoa will yield a darker, richer result.
- Preventing Sticking: Always ensure your tin is well-greased and lined. Parchment paper is your best friend here, preventing the chocolate from adhering stubbornly to the tin.
Serving & Storage Suggestions
The beauty of Wicklewood’s Schooldays Chocolate Concrete lies in its versatility. It can be enjoyed in its purest form or paired with a delightful accompaniment.
- Serving Warm: For a comforting, almost brownie-like texture, serve slices of the chocolate concrete immediately after baking, while it’s still warm. It’s particularly wonderful when paired with a dollop of Wicklewood’s School Day’s Green Custard. The contrast between the warm, slightly soft chocolate and the cool, creamy custard is a classic for a reason.
- Serving Cold: To achieve the iconic, satisfyingly hard crunch, allow the chocolate concrete to cool completely at room temperature. Once cooled, it can be cut into squares or bars. This is the perfect way to enjoy it for a true nostalgic hit.
- Storage: Leftover Chocolate Concrete, once completely cooled, can be stored in an airtight container at room temperature for up to 3 days. If you live in a particularly warm climate, storing it in the refrigerator might be advisable to maintain its firmness. It does not freeze particularly well, as the texture can become somewhat compromised upon thawing.
Nutritional Information
(Note: Nutritional information is an estimate and can vary based on specific ingredients used.)
| Nutrient | Amount per Serving | % Daily Value |
|---|---|---|
| Calories | 620.9 kcal | |
| Calories from Fat | 230 g | |
| Total Fat | 25.6 g | 39% |
| Saturated Fat | 15.9 g | 79% |
| Cholesterol | 61 mg | 20% |
| Sodium | 167.5 mg | 6% |
| Total Carbohydrate | 97.8 g | 32% |
| Dietary Fiber | 6.4 g | 25% |
| Sugars | 50 g | 199% |
| Protein | 8.6 g | 17% |
Variations & Substitutions
While the classic recipe is perfect as is, there’s always room for a little culinary creativity.
- Chocolate Chips: For an extra burst of chocolatey goodness and a slightly chewier texture, fold in 50-100g of your favourite chocolate chips (dairy-free if needed) into the crumble mixture before pressing it into the tin.
- Nutty Addition: A handful of finely chopped nuts like walnuts or pecans can add a delightful crunch and depth of flavour. Ensure they are chopped small enough to integrate well with the crumble.
- Spiced Chocolate: A pinch of cinnamon or a whisper of cayenne pepper can add an unexpected warmth and complexity to the chocolate flavour.
- Alternative Sweeteners: While granulated sugar provides the classic structure and sweetness, you could experiment with coconut sugar for a slightly different caramel note. If using an artificial sweetener, follow the manufacturer’s guidelines for equivalent sweetness to 7 ounces of granulated sugar.
FAQs (Frequently Asked Questions)
Q: Why is it called “Chocolate Concrete”?
A: The name comes from its famously dense, hard, and somewhat unyielding texture when fully cooled, reminiscent of concrete.
Q: Can I make this recipe using regular wheat flour?
A: Absolutely! If using regular plain flour, follow the standard instructions without the extra butter and extended baking time. The gluten in wheat flour will provide a slightly different, more traditional texture.
Q: Is it essential to use gluten-free flour?
A: The recipe as presented here is specifically adapted for gluten-free requirements. If you don’t require gluten-free, you can use regular plain flour, omitting the additional butter and extra baking time mentioned in the instructions.
Q: What is “green custard” and why is it served with Chocolate Concrete?
A: Green custard is traditionally made by adding a drop of green food colouring to a standard vanilla custard. It’s a classic school dinner pairing, offering a cool, creamy contrast to the dense, chocolatey cake.
Q: How can I make sure my gluten-free Chocolate Concrete isn’t dry?
A: The recipe’s adjustment of adding an extra ounce of butter and a slightly longer bake time for the gluten-free version is specifically designed to prevent dryness. Ensure you measure your gluten-free flour accurately.
Final Thoughts
There’s a unique joy in revisiting childhood favourites, especially when you can recreate them with such ease and adapt them to modern dietary needs. Wicklewood’s Schooldays Chocolate Concrete, in its gluten-free incarnation, offers that perfect blend of nostalgia and deliciousness. It’s a testament to the fact that simple ingredients, treated with a little care, can produce something truly special. So gather your ingredients, embrace the simple joy of rubbing butter into flour, and transport yourself back to the schoolyard with every satisfying bite. I’d love to hear how yours turns out, especially if you pair it with that wonderfully retro green custard!