
T.G.I. Friday’s Fat-Free Cheesecake: A Light Touch of Sweetness
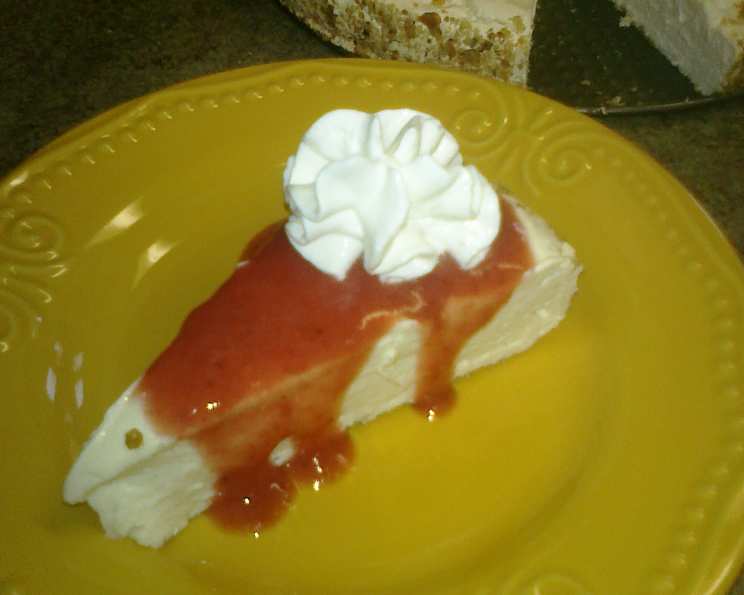
I still remember the first time I encountered this “lite” version of a cheesecake. It was a revelation, a whisper of the decadent treat I adored, but without the heavy feeling that often followed. Standing in a bustling T.G.I. Friday’s, the creamy, tangy delight arrived, looking every bit as luxurious as its full-fat counterpart. The key was in the subtle textures and the bright, fresh strawberry sauce, a perfect counterpoint to the delicate cheesecake. This recipe, adapted from “Top Secret Recipes, LITE!”, promised a guilt-free indulgence, and it certainly delivered. The simplicity of the ingredients and the straightforward method make it an approachable project for any home baker looking for a lighter dessert option. You’ll need a 9-1/2 inch springform pan for this recipe, and be sure to let the cream cheese come to room temperature before you use it.
Recipe Overview
- Prep Time: 30 minutes
- Cook Time: 50-60 minutes
- Total Time: Approximately 3 hours (including cooling and chilling)
- Servings: 12
- Yield: 1 pie
- Dietary Type: Reduced-Fat
Ingredients
Here’s what you’ll need to create this lighter, yet satisfying, cheesecake:
For the Cheesecake Filling:
- Five (8 ounce) packages fat-free cream cheese, softened to room temperature
- 1 1⁄4 cups sugar
- 2⁄3 cup nonfat sour cream
- 2 1⁄2 tablespoons all-purpose flour
- 2 teaspoons vanilla extract
- 1⁄2 cup egg substitute
For the Crust:
- 1 tablespoon ground pecans (finely processed)
- 3 tablespoons graham cracker crumbs
- 1 1⁄2 teaspoons sugar
- Nonstick cooking spray
For the Strawberry Sauce:
- 8 ounces frozen strawberries
- 1⁄3 cup sugar
- 2 tablespoons water
Equipment Needed
- 9-1/2 inch springform pan
- Electric mixer (stand mixer or hand mixer)
- Large mixing bowl
- Food processor or blender (for processing pecans and making sauce)
- Microwave-safe bowl
- Whisk
- Measuring cups and spoons
- Spatula
- Cooling rack
- Blender (for pureeing sauce)
- Fine-mesh strainer
Instructions
Let’s bring this delightful cheesecake to life, step by step.
- Prepare the Cream Cheese: Begin by ensuring your fat-free cream cheese is at room temperature. This is crucial for achieving a smooth, lump-free filling.
- Preheat the Oven: Set your oven to 325°F (160°C).
- Whip the Cream Cheese: In a large mixing bowl, use an electric mixer to whip the softened cream cheese until it is completely smooth.
- Incorporate Dry Ingredients and Flavorings: Gradually add the sugar, nonfat sour cream, flour, and vanilla extract to the cream cheese. Beat well until all ingredients are thoroughly combined and the mixture is smooth.
- Add the Egg Substitute: Gently add the egg substitute to the cream cheese mixture. Mix only until combined. It’s very important not to overmix once the egg substitute has been added, as this can lead to a tougher texture.
- Prepare the Crust: To create the crust, measure the ground pecans after processing them in a food processor or blender. Return them to the processor. Add the graham cracker crumbs and the 1-1⁄2 teaspoons of sugar. Pulse for 15 seconds until you achieve a fine, uniform meal.
- Prepare the Springform Pan: Spray the inside of your 9-1⁄2 inch springform pan with a light coating of nonstick cooking spray. Be sure to wipe off any excess spray around the top rim of the pan. The spray should only lightly coat the bottom and about 2 inches up the sides.
- Form the Crust: Dump the prepared crumb mixture into the lightly greased springform pan. Swirl the pan so that the bottom and sides are evenly coated with the crumbs. Lightly tap out any excess crumbs.
- Fill the Cheesecake: Carefully pour the cream cheese mixture into the prepared pan, taking care not to disturb the crumb crust when pouring. Gently spread the cheese mixture close to the edge of the pan, but avoid touching the sides directly, as this can dislodge the crumbs.
- Bake the Cheesecake: Place the springform pan in the preheated oven. Bake for 50-60 minutes, or until the top of the cheesecake is firm. The center may still appear slightly soft, and this is perfectly normal; it will continue to set as it cools.
- Cool the Cheesecake: Once baked, remove the cheesecake from the oven. Cover the cheesecake and allow it to cool at room temperature for 2 hours.
- Chill the Cheesecake: After cooling on the counter, refrigerate the cheesecake.
- Prepare the Strawberry Glaze: While the cheesecake is chilling, prepare the strawberry glaze. In a microwave-safe bowl, combine the frozen strawberries, sugar, and water. Cover the bowl.
- Microwave the Sauce: Microwave the strawberry mixture on 50% power for 2 minutes. If the strawberries are still frozen, you may need to heat the mixture for an additional 2-4 minutes (for a total of 4-6 minutes).
- Dissolve Sugar and Steep: Stir the mixture to dissolve the sugar completely. Let it stand for 10-15 minutes to allow the flavors to meld.
- Puree the Sauce: Pour the strawberry mixture into a blender and puree until smooth.
- Strain and Chill: For a silken texture, strain the pureed strawberry sauce through a fine-mesh strainer. Discard any solids. Chill the strawberry sauce until ready to serve.
- Serve: Cut the chilled cheesecake into 12 slices. Serve each slice with approximately 1 tablespoon of the chilled strawberry sauce drizzled on top. This recipe yields 4 Points per serving (1 slice).
Expert Tips & Tricks
- Room Temperature is Key: Don’t skimp on bringing your cream cheese to room temperature. It’s the foundation for a smooth, creamy cheesecake. If you’re short on time, you can carefully cut the cream cheese into smaller cubes and let it sit on the counter for about 30-45 minutes, or gently warm it in the microwave on the defrost setting for very short intervals, being careful not to melt it.
- Gentle Mixing: When adding the egg substitute, a light touch is essential. Overmixing can incorporate too much air, which can cause the cheesecake to puff up excessively and then crack as it cools.
- Crumb Crust Perfection: For the crust, a food processor or blender is your best friend for achieving a fine, even texture. This ensures the crust adheres well to the pan and provides a delicate base.
- Cooling is Crucial: The two-hour cooling period at room temperature and subsequent refrigeration are vital for the cheesecake to set properly. Rushing this process can result in a softer, less defined slice.
- Sauce Consistency: If you prefer a thicker strawberry sauce, you can reduce the water slightly or simmer the pureed sauce gently on the stovetop for a few minutes to thicken it.
Serving & Storage Suggestions
This Fat-Free Cheesecake is best served chilled. A dollop of the vibrant strawberry sauce is the classic accompaniment, but you could also try a drizzle of sugar-free chocolate syrup or a sprinkle of fresh mint for a pop of color and freshness.
Storage:
- Refrigerated: Leftover cheesecake can be stored, tightly covered, in the refrigerator for 3-4 days.
- Frozen: While this cheesecake is best enjoyed fresh, you can freeze portions. Wrap individual slices tightly in plastic wrap and then in aluminum foil, or freeze the whole cheesecake before slicing. It can be stored in the freezer for 1-2 months. Thaw overnight in the refrigerator before serving.
Nutritional Information
| Nutrient | Amount per Serving | % Daily Value |
|---|---|---|
| Calories | 245.2 kcal | |
| Calories from Fat | ||
| Total Fat | 1.7 g | 2% |
| Saturated Fat | 0.8 g | 3% |
| Cholesterol | 12.6 mg | 4% |
| Sodium | 700.7 mg | 29% |
| Total Carbohydrate | 40.6 g | 13% |
| Dietary Fiber | 0.5 g | 2% |
| Sugars | 34.6 g | 138% |
| Protein | 16.9 g | 33% |
Note: Nutritional values are approximate and can vary based on specific ingredients used.
Variations & Substitutions
While this recipe is designed to be a light version, you can certainly play with it:
- Berry Medley: Instead of just strawberries, use a mix of frozen mixed berries for the sauce. Raspberries, blueberries, and blackberries will add a delightful tang and color.
- Citrus Zest: For a brighter note in the cheesecake filling, consider adding a teaspoon of lemon or orange zest along with the vanilla extract.
- Nut-Free Crust: If nut allergies are a concern, you can create a crust using only graham cracker crumbs and sugar, or explore gluten-free options if needed. Ensure you have enough crumbs to coat the pan.
FAQs
Q: Why is it important for the cream cheese to be at room temperature?
A: Softened cream cheese blends much more smoothly, preventing lumps in your cheesecake filling and ensuring a consistent texture.
Q: My cheesecake cracked on top. Is it ruined?
A: Not at all! Cracking is a common occurrence with cheesecakes and doesn’t affect the taste. It often happens due to overmixing or sudden temperature changes during baking or cooling.
Q: Can I use whole eggs instead of egg substitute?
A: This recipe specifically calls for egg substitute to keep it lower in fat. If you were to substitute whole eggs, the fat content would increase, and you would likely need to adjust the other ingredients slightly.
Q: How can I make the strawberry sauce sweeter?
A: You can adjust the amount of sugar in the strawberry sauce to your preference. Start with the listed amount and add more, a tablespoon at a time, until it reaches your desired sweetness.
Q: What kind of graham crackers should I use for the crust?
A: Standard honey graham crackers are typically used. You can also find cinnamon or chocolate varieties if you want to experiment with different flavor profiles.
Final Thoughts
This T.G.I. Friday’s Fat-Free Cheesecake is a testament to the fact that indulgence doesn’t always have to come with a heavy price tag. It’s a delightful way to satisfy a sweet craving, offering a creamy, tangy experience with a bright, fruity finish. Perfect for potlucks, family gatherings, or a quiet evening at home, this recipe is a keeper. I encourage you to try it and discover for yourself how light and satisfying a cheesecake can be. Share your creations and any of your own delicious twists with fellow dessert lovers!