
WW 9 Points – Yankee Pot Roast: A Hug in a Bowl
Growing up, Sundays were synonymous with the aroma of a slow-cooked roast filling our home. It was a comforting, primal scent that promised a hearty meal shared with family. While my mother’s version was a classic, it wasn’t always the most “point-friendly” affair. So, when I discovered this WW 9 Points Yankee Pot Roast recipe, it felt like a revelation – the ability to recapture that nostalgic warmth and deep, savory satisfaction without the guilt. It’s a dish that proves healthy eating can be profoundly delicious and deeply satisfying, a true testament to thoughtful cooking that nourishes both body and soul.
Recipe Overview
- Prep Time: 20 minutes
- Cook Time: 3 hours 30 minutes
- Total Time: 3 hours 50 minutes
- Servings: 8
- Yield: 1 Pot Roast
- Dietary Type: Lean Protein, Hearty
Ingredients
- Cooking spray (5 one-second sprays per serving)
- 2 ½ lbs boneless bottom round roast, well trimmed
- ½ teaspoon black pepper
- ¼ teaspoon table salt
- 2 large onions, sliced
- 1 ¾ cups water
- 1 (8 ounce) packet onion soup mix
- 1 ½ tablespoons balsamic vinegar or 1 ½ tablespoons red wine vinegar
- 1 teaspoon dried thyme
- 8 large red potatoes, scrubbed and quartered (about 1 ¾ lbs)
- 1 lb baby carrots
- 1 tablespoon fresh parsley, chopped (for garnish)
Equipment Needed
- Dutch oven (a large pot with a tight-fitting lid)
- Stove-top burner
- Oven
- Blender
- Cutting board
- Sharp knife
Instructions
- Begin by preheating your oven to 350ºF. This ensures a consistent and even cooking environment for your pot roast.
- Next, coat a Dutch oven with cooking spray. Ensure you use the specified amount of cooking spray to adhere to the recipe’s point guidelines. A Dutch oven is ideal for its ability to withstand stovetop searing and oven braising, and its tight-fitting lid traps moisture beautifully.
- Place the Dutch oven over medium-high heat. Allow it to heat up properly before adding the roast.
- Sprinkle the roast generously with black pepper and table salt. This initial seasoning is crucial for building flavor from the outside in.
- Carefully place the seasoned roast into the hot Dutch oven. Then, scatter the sliced onions around the roast.
- Cook the roast and onions, turning the roast occasionally and stirring the onions. Continue this process until both the roast and onions are nicely browned, which should take about 8 minutes. This searing step is vital for developing deep, caramelized flavors.
- Once browned, pour the water into the pot. Then, stir in the onion soup mix, the balsamic vinegar (or red wine vinegar), and the dried thyme. Bring this mixture to a boil.
- Once boiling, cover the Dutch oven tightly with its lid. Cook for 1 ½ hours. This initial braising period allows the roast to begin tenderizing and the flavors to meld.
- After 1 ½ hours, add the quartered red potatoes and baby carrots to the pot, arranging them around the roast.
- Cover the Dutch oven again and bake in the preheated oven. Continue to cook until the roast and vegetables are fork-tender. This will take approximately 2 hours more. The total cooking time in the oven for the vegetables and the remainder of the roast is about 2 hours.
- To thicken the gravy, carefully remove one potato from the pot. Place this potato into a blender and puree it until smooth.
- Stir the pureed potato into the gravy within the Dutch oven. This will help to naturally thicken the sauce without adding flour or cornstarch.
- When everything is tender, transfer the roast to a cutting board. Slice the roast against the grain into 16 slices. Slicing against the grain is key for achieving a tender texture.
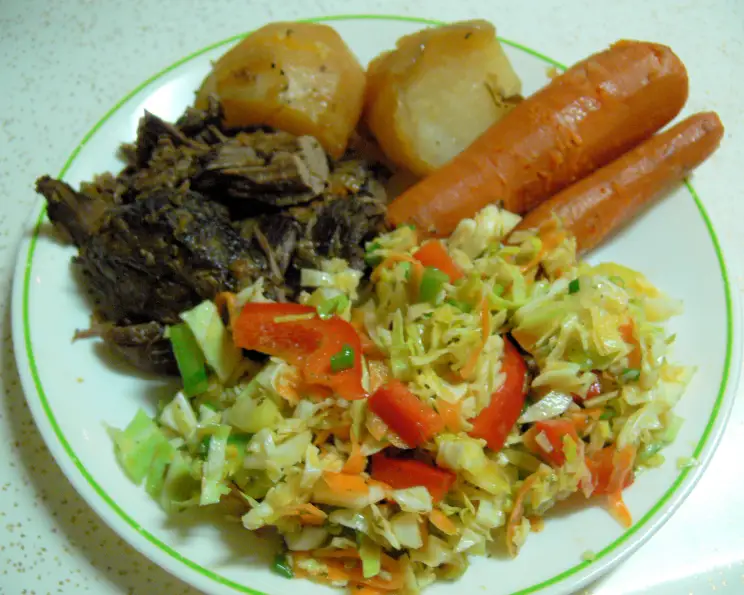
- Serve the sliced roast with the tender vegetables and the thickened gravy.
- The recipe yields about 2 slices of meat, 1 cup of vegetables, and ¼ cup of gravy per serving.
Expert Tips & Tricks
For an even richer flavor, consider searing the roast for a few minutes longer, ensuring a good crust develops. If you find your gravy isn’t thickening enough after adding the pureed potato, you can gently simmer the gravy uncovered for a few minutes to reduce it further. When quartering the potatoes, aim for pieces that are roughly uniform in size to ensure they cook evenly. Don’t be afraid to adjust the amount of vinegar slightly to suit your preference for tanginess. This dish is also fantastic made ahead; simply cool it completely after cooking, refrigerate, and reheat gently on the stovetop or in the oven.
Serving & Storage Suggestions
This Yankee Pot Roast is a complete meal in itself, best served piping hot. Garnish with freshly chopped parsley for a bright pop of color and fresh flavor that contrasts beautifully with the rich, savory stew. Leftovers can be stored in an airtight container in the refrigerator for up to 3-4 days. For reheating, gently warm the pot roast and vegetables in a saucepan over low heat, adding a splash of water or broth if needed to loosen the gravy. Alternatively, you can reheat it in a covered oven-safe dish at 300°F until heated through. Freezing is also an option, though the texture of the vegetables may soften slightly upon thawing.
Nutritional Information
| Nutrient | Amount per Serving | % Daily Value |
|---|---|---|
| Calories | 697.9 kcal | |
| Calories from Fat | 206 g | |
| Total Fat | 22.9 g | 35% |
| Saturated Fat | 8.3 g | 41% |
| Cholesterol | 92.2 mg | 30% |
| Sodium | 2514.2 mg | 104% |
| Total Carbohydrate | 84.6 g | 28% |
| Dietary Fiber | 9.8 g | 39% |
| Sugars | 13.6 g | 54% |
| Protein | 38.3 g | 76% |
(Note: Nutritional values are approximate and can vary based on specific ingredients and preparation methods.)
Variations & Substitutions
While this recipe shines with its classic components, feel free to explore. For a different flavor profile, you could experiment with adding a bay leaf or a sprig of rosemary during the braising stage. If you prefer a slightly sweeter note in your gravy, a touch of honey or maple syrup can be incorporated, though this will affect the point value. For those seeking a lower-sodium option, look for reduced-sodium onion soup mixes and adjust the added salt accordingly. You could also swap red potatoes for Yukon Golds or even sweet potatoes for a different nutritional profile and flavor.
FAQs
Q: Can I make this pot roast in a slow cooker?
A: Yes, you can adapt this recipe for a slow cooker. Sear the roast and onions on the stovetop as directed, then transfer everything to the slow cooker. Add the remaining ingredients (except for the pureed potato for thickening) and cook on low for 8-10 hours or on high for 4-5 hours, until the roast is tender. Thicken the gravy at the end using the pureed potato method.
Q: What is the best way to slice the roast against the grain?
A: To find the grain, look for the direction the muscle fibers are running. Slice perpendicular to these fibers. This breaks down the connective tissues, resulting in a much more tender bite.
Q: My gravy isn’t thickening. What can I do?
A: If the pureed potato didn’t thicken it sufficiently, you can carefully simmer the gravy uncovered on the stovetop for a few more minutes to allow some of the liquid to evaporate. Alternatively, you could create a slurry with a small amount of cornstarch or flour mixed with water and stir it into the simmering gravy until thickened.
Q: How do I ensure the vegetables are tender but not mushy?
A: The cooking time of 2 hours for the vegetables should render them perfectly tender. If you prefer them slightly firmer, you can reduce this baking time by 30 minutes. It’s always best to check for tenderness with a fork before serving.
Q: Can I use a different cut of beef for this recipe?
A: While bottom round is ideal for its lean quality and tenderness when slow-cooked, other tougher cuts like chuck roast or brisket can also work. These cuts may require a slightly longer cooking time to achieve the same level of tenderness.
Final Thoughts
This WW 9 Points Yankee Pot Roast is more than just a recipe; it’s a reminder that comforting, deeply satisfying meals are within reach, even when you’re mindful of your points. It’s the perfect dish for a chilly evening, a family gathering, or whenever you crave that hearty, home-cooked goodness. Gather your ingredients, embrace the aroma as it fills your kitchen, and savor every tender bite. I’d love to hear about your experience making this dish and any delightful twists you discover along the way!